Can You Epoxy A Bathroom Sink?
Can You Epoxy A Bathroom Sink? You can epoxy your bathroom sink and transform it into a beautiful focal point in your bathroom. Epoxy is a durable and long-lasting material that can be used to repair and refinish various surfaces, including sinks.
With just a little time and effort, you can have a stunning new sink that will impress anyone who steps foot in your bathroom. So let’s get started on this exciting DIY project!
Contents
Key Takeaways
- Epoxy can be used to repair small cracks in bathroom sinks
- Larger cracks or significant damage may require sink replacement
- Proper preparation and application techniques are crucial for a flawless finish
- Epoxy provides a durable and long-lasting solution for bathroom sink restoration
Can You Epoxy A Bathroom Sink?
Epoxy resin, a versatile polymer, has been employed for various applications due to its adhesive and protective qualities. However, its application on bathroom sinks raises important considerations.
Advantages:
- Aesthetic Enhancement: Epoxy coatings can revitalize the appearance of a bathroom sink, providing a glossy and renewed surface.
- Cost-Efficiency: Refinishing with epoxy may be more budget-friendly compared to replacing the entire sink unit.
Concerns:
- Toxicity: Epoxy resins can emit harmful fumes during application and curing, posing health risks if inhaled or ingested.
- Durability: Bathroom sinks endure continuous exposure to moisture and humidity. Epoxy’s capacity to withstand these conditions is debated, as it might degrade over time.
- Surface Preparation: Proper surface cleaning and preparation are vital for epoxy adhesion. Improper preparation could lead to peeling or bubbling over time.
- Professionalism: Achieving a seamless and durable epoxy finish requires skill and experience. DIY attempts might lead to subpar results.
Precautions:
- Research: Thoroughly investigate epoxy’s compatibility with sink materials, ventilation requirements, and safety precautions.
- Consultation: Seek advice from professionals or experts familiar with epoxy applications and bathroom fixtures.
- Alternatives: Consider other options such as sink replacement or professional refinishing services, which may ensure a longer-lasting result.
While epoxy offers potential benefits for bathroom sink refinishing, its appropriateness hinges on a careful assessment of toxicity risks, durability concerns, and proper application techniques. Prior research, expert consultation, and an informed decision-making process are essential when contemplating epoxy use on bathroom sinks.
How Do You Epoxy A Bathroom Sink?
Assess the Condition of Your Sink
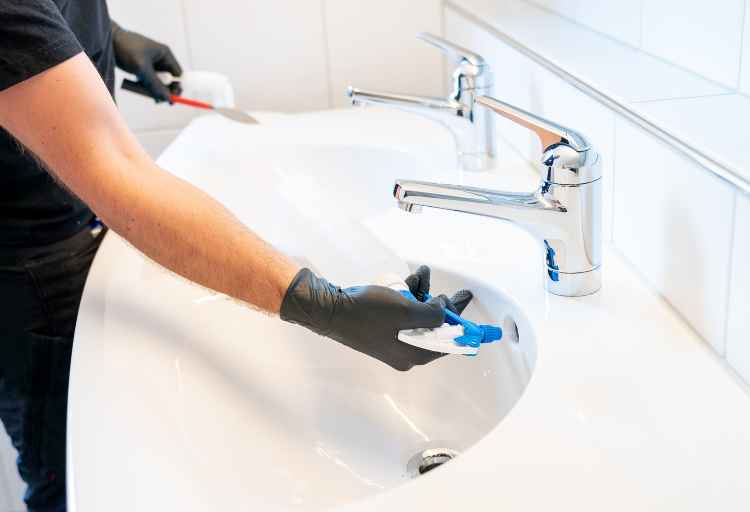
Before you dive into the process, take a moment to evaluate the state of your bathroom sink. Start by inspecting for any cracks or damage. If you notice small cracks in your sink, epoxy can be an effective solution to repair them.
However, if the cracks are larger or there is significant damage to the sink, epoxy might not be enough and you may need to consider replacing damaged parts instead.
To repair cracks with epoxy, begin by cleaning the surface of your sink thoroughly. Then, mix the epoxy according to the instructions provided with the product. Apply a thin layer of epoxy over the cracked area and allow it to dry completely before using your sink again.
Remember that while epoxy can provide a temporary fix for minor damages, it’s important to assess whether repairing cracks or replacing damaged parts would be a more suitable long-term solution for your bathroom sink.
Gather the Necessary Materials
First, make sure you have all the materials needed to complete the task successfully. When it comes to epoxy sink maintenance, it’s crucial to have the right tools. You’ll need epoxy adhesive, a mixing container, a putty knife or spatula, sandpaper, and a clean cloth.
Using epoxy for sink repair offers several advantages. Firstly, it provides a durable and long-lasting solution for fixing cracks or chips in your bathroom sink. Epoxy is resistant to water damage and can withstand daily use without deteriorating.
Additionally, epoxy is easy to work with and dries quickly, allowing you to complete the repair efficiently. Its adhesive properties ensure that the repaired area remains securely bonded.
By gathering these necessary materials and utilizing epoxy for sink repair, you can effectively maintain your bathroom sink’s functionality and appearance for years to come.
Prepare the Epoxy Mixture
To effectively prepare the epoxy mixture, gather all the necessary materials and make sure you have a clean work area. This is crucial for a successful epoxy application.
Start by double-checking if you have epoxy resin, hardener, mixing cups, stirring sticks, gloves, and any other tools specified in your epoxy kit. Once everything is ready, ensure your work area is clean and free from dust or debris that could ruin the final result.
Now that you’re set up with all the materials in place, it’s time to mix the epoxy. Follow the instructions provided with your specific product carefully as different brands may have slightly different ratios and curing times.
Mixing too much or too little can cause problems later on. Use a stirring stick to thoroughly mix the resin and hardener together until they’re completely blended.
If you encounter any troubleshooting issues during this process, such as air bubbles or uneven application, refer to the epoxy manufacturer’s guidelines for tips on how to fix these problems.
Taking the time to properly prepare your epoxy mixture will greatly increase your chances of achieving a smooth and durable finish on your bathroom sink.
Apply the Epoxy to the Sink
Now, it’s time for you to give your sink a stunning transformation by carefully applying the epoxy mixture.
Proper application techniques for epoxy on bathroom sinks are crucial to achieve a flawless finish. Start by ensuring that the sink is clean and dry before applying the epoxy. Use a high-quality brush or roller to evenly coat the surface, working in small sections at a time.
Be sure to follow the manufacturer’s instructions regarding drying times and number of coats needed.
To avoid common mistakes when applying epoxy to a bathroom sink, make sure not to rush the process. Take your time and apply thin layers of epoxy, allowing each layer to fully cure before adding another one.
Avoid overbrushing or over-rolling, as this can create streaks or bubbles in the final finish. Additionally, be mindful of dust particles or debris that may land on the wet epoxy surface during application.
Allow the Epoxy to Cure
After patiently applying the epoxy mixture, it’s time to let it cure and watch as your sink undergoes a mesmerizing transformation. The curing process is crucial in ensuring that the epoxy bonds securely to the surface of your bathroom sink.
It’s important to follow the manufacturer’s instructions regarding drying time, as this can vary depending on the type of epoxy used. Typically, epoxy takes around 24 hours to fully cure, but it’s always a good idea to double-check the specific drying time for your product.
During this period, make sure to avoid using the sink or exposing it to water or any other liquids that may interfere with the curing process.
Once completely cured, you’ll be left with a beautifully restored and durable bathroom sink that will withstand daily use for years to come.
Conclusion
So there you have it! Now that you know the steps involved, you can confidently epoxy your bathroom sink.
Remember to assess the condition of your sink and gather all the necessary materials before starting. Prepare the epoxy mixture and apply it to the sink, making sure to follow the instructions carefully.
Frequently Asked Questions
Can I use any type of epoxy to repair my bathroom sink?
Yes, you can use epoxy to repair your bathroom sink. However, it’s important to follow proper epoxy application techniques and avoid common mistakes in epoxy repairs for the best results.
How long does it typically take for the epoxy to fully cure?
The epoxy curing time for bathroom sink repair varies depending on the product used. It’s best to choose an epoxy specifically designed for this purpose, as it will provide optimal adhesion and typically takes around 24-48 hours to fully cure.
Is it necessary to remove the sink from the bathroom before applying the epoxy?
It is not necessary to remove the sink from the bathroom before applying epoxy, but it is recommended for better results. Removing the sink allows for easier access and ensures a more thorough repair.
Can I apply multiple layers of epoxy to ensure a stronger repair?
Yes, you can apply multiple layers of epoxy to ensure a stronger repair. However, keep in mind that epoxy can also be used to repair other bathroom fixtures and there are alternative methods for repairing bathroom sinks as well.
Are there any specific safety precautions I should take when working with epoxy in a bathroom setting?
When working with epoxy in a bathroom, it is important to take safety precautions. Make sure the area is well-ventilated, wear protective gloves and eye goggles, and follow the instructions carefully.
Afterward, allow the epoxy to cure for the recommended time. With a little bit of patience and effort, your bathroom sink will look brand new again!
