Can You Reglaze A Bathroom Sink?
Reglazing is a process that involves applying a new layer of glaze to the surface of your sink, restoring its shine and durability.
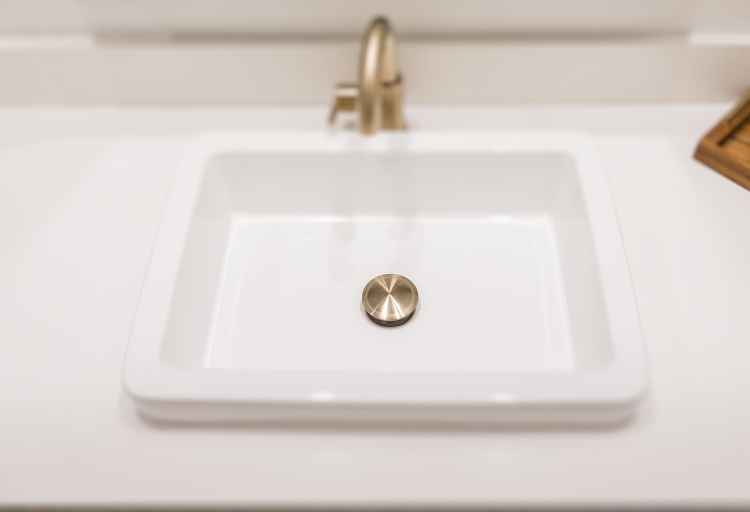
Can You Reglaze A Bathroom Sink? Yes, you can reglaze a bathroom sink. Reglazing is a restorative process wherein bathroom sinks, encompassing various types such as drop-in, under-mount, pedestal, wall-mounted, all-in-one countertop with sink, and farmhouse sinks, can be refinished. This involves repairing damage and applying a new glaze layer to rejuvenate appearance and functionality.
So grab your tools and get ready to transform your old sink into a stunning centerpiece for your bathroom!
Contents
- Key Takeaways
- Can You Reglaze A Bathroom Sink: Understand the Reglazing Process
- Benefits of Reglazing your Bathroom Sink
- Determine if it’s a DIY Project or Requires Professional Help
- Gather the Necessary Tools and Materials
- How to Reglaze Your Bathroom Sink: Step-by-Step Guide
- Conclusion
- Frequently Asked Questions: Can You Reglaze A Bathroom Sink?
Key Takeaways
- Reglazing is a cost-effective alternative to replacing a bathroom sink.
- Proper cleaning and preparation of the surface are crucial for successful reglazing.
- Reglazing can improve the appearance and lifespan of a bathroom sink.
- Research and purchase the appropriate reglazing kit for the specific sink material.
Can You Reglaze A Bathroom Sink: Understand the Reglazing Process
Yes, you can definitely reglaze a bathroom sink to give it a fresh and new look. Reglazing techniques involve stripping off the old finish and applying a new coat of glaze to the surface of the sink. It’s a cost-effective way to update your bathroom without having to replace the entire sink.
However, there are some common mistakes that people make when attempting to reglaze their bathroom sinks. One mistake is not properly cleaning and preparing the surface before applying the new glaze.
This can result in poor adhesion and an uneven finish. Another mistake is using low-quality materials or not following the instructions carefully, which can lead to a subpar end result.
To ensure success, it’s important to research proper reglazing techniques and take your time with each step of the process.
Benefits of Reglazing your Bathroom Sink
Enhance the appearance and lifespan of your bathroom fixture by giving it a fresh, renewed finish. Reglazing your bathroom sink offers several benefits.
One major advantage is cost savings; reglazing is much cheaper than replacing the entire sink. Additionally, reglazing allows you to update the look of your bathroom without the hassle of a full renovation. You can choose from a variety of colors and finishes to match your desired aesthetic.
However, there are also some cons to consider. The reglazed surface may not be as durable as the original material, so it’s important to use non-abrasive cleaners and avoid harsh chemicals that could damage the finish.
To maintain your reglazed sink, regularly clean with mild soap and water, avoiding abrasive sponges or scrub brushes. By following these tips, you can enjoy a beautifully rejuvenated bathroom sink for years to come.
Determine if it’s a DIY Project or Requires Professional Help
Deciding whether to tackle the project yourself or seek professional assistance is crucial in determining the best course of action. When it comes to reglazing your bathroom sink, you need to consider both DIY and professional options.
If you have experience with home improvement projects and feel confident in your skills, doing it yourself can save you money. DIY reglazing kits are available at affordable prices, allowing you to transform your sink without breaking the bank.
However, keep in mind that reglazing requires attention to detail and proper ventilation, so make sure you have the necessary tools and safety precautions.
On the other hand, hiring a professional may be more expensive upfront but can provide better results and peace of mind. Professionals have the expertise and equipment needed for a flawless finish. They also handle all the preparation work, saving you time and effort.
Ultimately, weigh the cost comparison between DIY and professional assistance based on your skills, budget, and desired outcome before making a decision.
Gather the Necessary Tools and Materials
To prepare for reglazing your bathroom sink, start by researching and purchasing the right reglazing kit that suits your needs. Look for a kit that includes all the necessary materials such as primer, paint, and sealant.
Next, gather safety equipment and protective gear like gloves, goggles, and a respirator to ensure your safety during the process.
Finally, make sure to prepare the workspace by cleaning the sink thoroughly and removing any hardware or fixtures that may obstruct the reglazing process.
Researching and purchasing the right reglazing kit
Sure, finding the perfect reglazing kit for your bathroom sink can be a fun and exciting process! When researching options, it’s important to consider factors like the quality of the product and its compatibility with your specific sink material.
Start by looking for reputable brands that offer reglazing kits specifically designed for bathroom sinks. Read customer reviews to get an idea of how well each kit performs and whether it delivers satisfactory results.
Additionally, comparing prices is crucial to ensure you get the best value for your money. Take note of any additional tools or materials needed that may not be included in the kit, as this could impact the overall cost.
By thoroughly researching and carefully considering all options, you’ll be able to find the right reglazing kit that will restore your bathroom sink beautifully.
Gathering safety equipment and protective gear
When it comes to gathering safety equipment and protective gear, don’t forget to prioritize your personal well-being by investing in items such as goggles, gloves, and a respirator mask.
Choosing the right safety gear is crucial to ensure that you are adequately protected during the reglazing process. Goggles will shield your eyes from any splashes or fumes, while gloves will protect your hands from chemicals and potential injuries.
Additionally, wearing a respirator mask is essential for filtering out harmful fumes and particles that may be released during the reglazing process.
Proper ventilation is also of utmost importance to prevent the buildup of toxic gases. Make sure to open windows or use fans to create a constant flow of fresh air in the bathroom.
By taking these precautions, you can safely tackle reglazing your bathroom sink without compromising your health.
Preparing the workspace for the reglazing process
Now that you’ve gathered all the necessary safety equipment and protective gear, it’s time to prepare your workspace for the reglazing process.
This step is crucial to ensure a successful outcome. Begin by thoroughly cleaning the bathroom sink using a mild detergent or cleaner specifically designed for this purpose. Make sure to remove any dirt, grime, or residue that may interfere with the adhesion of the reglazing material.
Once clean, lightly sand the surface of the sink using fine-grit sandpaper. This will help create a rough texture that allows the reglazing material to bond effectively. Be careful not to apply too much pressure while sanding, as it could damage the sink’s surface.
After cleaning and sanding, wipe down the sink again to remove any dust or debris before proceeding with the reglazing process.
How to Reglaze Your Bathroom Sink: Step-by-Step Guide
To prepare the surface and remove old coatings, you’ll need to thoroughly clean your bathroom sink using a non-abrasive cleaner and a scrub brush.
After that, use sandpaper or a chemical stripper to remove any remaining coatings or stains.
When applying the reglazing materials evenly, make sure to follow the manufacturer’s instructions carefully and use a high-quality brush or roller for smooth application.
Lastly, allow the reglazed sink to cure for the recommended amount of time before using it again, and finish off by wiping it down with a soft cloth to ensure a polished look.
Preparing the surface and removing old coatings
Before you can reglaze a bathroom sink, it’s essential to properly prepare the surface and remove any old coatings that may be present. Surface preparation is crucial for ensuring that the new glaze adheres properly and lasts for a long time.
Start by thoroughly cleaning the sink with a mild detergent to remove any dirt, grime, or soap scum. Use a scrub brush or sponge to gently but effectively scrub the surface. After cleaning, rinse the sink thoroughly with water and dry it completely using a clean towel.
Next, you’ll need to remove any existing coatings on the sink. This could include layers of paint, enamel, or even previous coats of glaze. To do this, use a paint stripper or chemical remover specifically designed for your type of sink material.
Follow the instructions carefully and apply the stripper evenly over the entire surface. Allow it to sit for the recommended amount of time before using a scraper or putty knife to peel off the old coating.
By properly preparing and removing old coatings from your bathroom sink, you’ll create a smooth and clean surface ready for reglazing.
Applying the reglazing materials evenly
Once the surface is properly prepared and old coatings are removed, it’s time to evenly apply the reglazing materials. This step is crucial for achieving a smooth and durable finish on your bathroom sink.
Make sure you follow the instructions provided by the manufacturer of the reglazing kit you’ve chosen.
Start by mixing the reglazing materials thoroughly, ensuring that all components are well blended. Use a high-quality brush or roller to apply an even coat of the mixture onto the sink surface. Take your time and work in small sections to avoid streaks or uneven coverage.
One common mistake in reglazing applications is applying too thick of a layer. This can lead to drips or sagging, resulting in an unattractive finish. Remember, it’s better to apply multiple thin coats rather than one thick one.
Another mistake is not allowing enough drying time between coats. Follow the manufacturer’s recommendations for drying times and make sure each coat is fully cured before applying another one.
By applying the reglazing materials evenly and avoiding these common mistakes, you can achieve a beautifully restored bathroom sink that looks fresh and new again.
Curing and finishing the reglazed sink
After applying the reglazing materials evenly, it’s time to let the sink cure and add the finishing touches. The curing time is crucial for achieving a durable and long-lasting finish. Make sure to follow the manufacturer’s instructions regarding the recommended curing time.
During this period, avoid using the sink or placing any objects on its surface to allow the reglazing materials to fully harden and bond with the sink.
Once the curing process is complete, you can start enjoying your newly reglazed bathroom sink. However, it’s important to note that proper maintenance is essential for preserving its appearance and longevity.
Avoid using abrasive cleaners or scrub brushes that could scratch or damage the surface. Instead, use gentle cleansers and soft cloths to clean your reglazed sink regularly.
By following these simple maintenance tips, you can keep your reglazed bathroom sink looking beautiful for years to come.
Conclusion
In conclusion, you can reglaze your bathroom sink to give it a fresh new look. Whether you choose to tackle the project yourself or hire a professional, understanding the reglazing process and gathering the necessary tools and materials is crucial.
By following our step-by-step guide, you can successfully transform your bathroom sink and enjoy the benefits of a beautiful and durable finish.
Frequently Asked Questions: Can You Reglaze A Bathroom Sink?
How long does the reglazing process typically take?
The reglazing process typically takes around 24-48 hours. To prepare a bathroom sink for reglazing, clean it thoroughly and remove any hardware. Afterward, follow these tips for maintaining a reglazed bathroom sink to prolong its lifespan.
Can any type of bathroom sink be reglazed?
Yes, any type of bathroom sink can be reglazed. Reglazing has several pros like cost-effectiveness and giving your sink a brand-new look. However, there are cons such as potential fumes during the process.
Is it necessary to remove the sink from the bathroom during the reglazing process?
Removing the sink during reglazing has its pros and cons. While it ensures thorough coverage, it can be time-consuming and may require professional assistance. DIY reglazing might be cost-effective, but hiring professionals ensures a better quality finish.
What is the average cost of reglazing a bathroom sink?
The average cost of reglazing a bathroom sink is around $200 to $500. It’s an affordable option that can save you money compared to replacing the entire sink. The benefits include a fresh, new look and improved durability.
How long does the reglazed finish usually last before it needs to be redone?
With proper maintenance, a reglazed finish on a bathroom sink can last for many years. Experts recommend avoiding abrasive cleaners and using non-abrasive products to clean the surface regularly to extend its lifespan.
